Tuesday, August 27, 2013

Sweater Pillow

Today, I was trying to clean out my sewing room. I had two sweaters that were sitting next to each other that just happened to be Christmas colors. I thought what better way to get rid of these and clean my sewing room than making something out of them. I immediately thought of a pillow, because really pillows are quick and easy and I would feel it was useful too without feeling too bad that I cut up two totally and completely useful sweaters. Well, they would be useful if I fit in them.....
ANYWAY… And what better way to kick off the Halloween season, then making a Christmas pillow! Oh, you didn't know it was the Halloween season? Well, apparently all of the stores think it is. So, Christmas pillow in August!
First, cut up perfectly good sweaters. I leave as wide an area as possible. Then, I figure out the biggest square area I can get out of the part of the fabric I'm going to use. Cut a square of lining fabric, any scrap fabric that is big enough will do. The lining fabric is important when making sweater pillows because it helps them retain their shape, keeps them from unraveling while you sew, and keeps the stuffing from coming out of the pillow. Make sure the fabric is cut well, that the corners are square, and there are two identical squares. One square for the front and one for the back. Then, pin the squares (with lots of pins) onto the sweater fabric. It's nice when the fabric has a stripe, like the green and white fabric because I could line it up with the lines and ridges and know I was getting the fabric even on all sides.

After pinning, sew the lining to the sweater fabric, using a walking foot and a zig-zag stitch. The A zig-zag stitch allows the fabric to stretch when it is stuffed, and the walking foot helps the sweater fabric move with the more rigid lining fabric so there isn't a lot of stretching and bunching.  
If you don't want to add an embroidered detail to the front, then skip this step....
I drew a simple picture on the lining fabic, cut it out and sewed it onto some of the sweater fabric. I didn't even pin it down since it was all straight lines. If I was doing something more complicated, I would've pinned it. Then, I trimmed it pretty close to the edge of the lining and sewed it to the center front of the pillow. 

Trim the front and back pieces to the edge of the lining fabric and sew them together with right sides facing each other. Leave about 1/2 inch seam allowance. I just lined up the edge of the fabric with the outside edge of my walking foot. Leave a 2-3 inch gap on one of the sides as you sew around the edge so that you can turn the pillow right side out. Before turning the pillow out, clip the corners as shown below.

 
Then, stuff the pillow through the gap in the seam. Fill it nice and tight. Make sure to get stuffing into each corner and distribute it evenly. Finally, turn the raw edges of the gap under and hand stitch the seam together. The sweater material is very forgiving. I didn't even have to be careful and it looked really nice.
 
Enjoy your recycled handiwork! Merry Christmas! ;-)

Saturday, June 22, 2013

Chalkboard door

I wanted walk-in access to our attic, so we added a door in my youngest son's room into the attic space. After looking at insulated doors and their prices, I knew I didn't want to spend the money to get an insulated door that would match the rest of the interior doors (or should I say closely match- there were no doors that matched exactly).
So instead, I decided to get the cheapest primed metal insulated door with the plan to make it a fun focal point in the room instead of a what-the-heck-is-a-door-doing-there eyesore.
We installed the door, I painted the trim and the perimeter of the door in latex white paint to match the trim and doors throughout the house. Then I painted the center with black chalkboard paint. It looked too boring, so I added some high-gloss latex cobalt blue paint that I had leftover from a different project....still boring, and the dark blue matched the black too closely.... so then, I  handpainted a apple green stripe around the outside of the chalk paint using good old acrylic craft paint. Perfect!
After the chalk paint had cured for a few weeks (I don't think you have to wait that long, read the can to find out actually curing time) I seasoned the chalkboard by rubbing it all over with the side of a white piece of chalk. Last, I rubbed all the chalk off- this keeps the chalk marks from leaving permanent marks.
I've claimed the top of the chalkboard. Wes colored the bottom with art- his first creation he deemed a "rainbow, Christmas-tree, mountain." Love it!

Oh, and one last thing. Because the door is metal I used an old magnetic locker pencil holder to hold the chalk, and we can also play with magnets on the door! Bonus!

Thursday, June 13, 2013

Fun with the kids, Chalk Super-heros

If you ever want to do something super fun with your kids, that is super easy- then I've got the activity for you!
It's this easy: Outline their bodies with chalk, have them tell you what super-powers they possess, add superpowers to the drawing, and let them color the chalk super heros in. Make sure to write out the super hero name and powers- and get a picture!
FUN!!!

Pincushion


I saw the most lovely pincushion on my Instagram feed. The french knots made me squeel in delight. I had to make one, like immediately.
Vanessa Christenson of V and Co. wrote this tutorial on French knots, it's the best one I've ever had to follow.

I cut out a four inch square piece of painters cloth canvas (It's what I had lying around). I used a disappearing ink pen to draw the design. I followed her instructions on the French knot and went to town making the knots. It uses a ton of thread! I was surprised at how much and how fast I went through thread.
After the hearts were finished, I sewed another square piece of canvas to the embroidered square, right sides together. I think I ended up making them about a 3 inch square. When sewing them together leave a 1 inch gap so you can turn it right side out. Fill with your favorite pin cushion filling. Lots of vetren sewers use crushed walnut shells... I had some poly pellets on hand, so I used those. But I wouldn't recommend it- they are too big and sometimes I have to shove the pin twice to get it into the pin cushion :-/. Then, hand stitch the one inch hole together.
I love it, and it makes me happy and makes my sewing table prettier!

Thursday, May 30, 2013

Kendra's Green juice

So I've been trying to lose weight. My fitness pal has been the app I've been using on my phone to help me along. The first 5 pounds just came off no problem. Then for almost three weeks I just stayed at the same weight. Boo. So I decided to join the juicing craze to jump start some more weight loss.
I decided a ten day juice fast would be the ticket.
I've been using a Breville juicer. Borrowed it from my amazing mother in law. 
My plan was to drink juice for every meal and two juice snacks a day. I did pretty good, with occasional snitches of food off my 3 year olds plate at dinner. It's only fair. He drank some of every juice batch I made!
I found that for breakfast and snacks that I loved making straight-up fruit juice, delicious!! And it kept me on track to enjoy the juice so much. But for lunch and dinner, I always added veggies and herbs.
My list of must haves: oranges, limes, lemons, golden delicious apples, pears, strawberries, kale, cucumber, romaine, spinach, carrots, ginger, and mint.
This is my recipe for the green juice I liked the most:

Kendra's Green Juice
Golden delicious apple
Pear
Lime
Half a cucumber 
A stalk of kale
Handful of spinach
Two sprigs of sweet mint
One inch of fresh ginger
Wash, cut off stems and ends, juice!
I love all my juice with lots of ice.
Today is my last day and I've been able to shed 6 pounds. :-)


Monday, April 1, 2013

Strawberry Nora Quilt

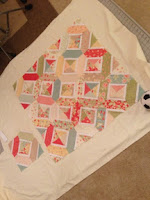
My sweet friends Courtney and Andy had a baby girl in February. She was born 11 weeks early and was, as her mother put it "feisty". They named her Nora, which I just loved (that's my daughters name, I think it's a beautiful name!) She brought joy to her family for only a few short days and then passed on to be with God again. Courtney is one of the sweetest people I've ever met in my life. I was so heartbroken to hear of the passing of their daughter, Nora. I wanted to do something, anything to help them feel even the smallest amount of comfort. And then it came to me, a quilt! I had the perfect fabric I bought two years ago and saved for something special. This was that something.

I saw a picture on Instagram of a quilt I just loved and knew it was the perfect pattern. I couldn't find the pattern online so I made up my own version that was a little different, but it was the effect I wanted.


I finished the quilt off with a hand embroidered label. Sometimes there are no words to fix stuff and no way to make something better- so you create something, with love, and hope it brings a little peace and happiness.

Saturday, March 30, 2013

Nora's cake

Overdue...
Nora's birthday cake. Super easy,  a ten inch round pan and an eight inch round pan. I used the eight inch pan to cut the semicircle in the larger cake so the 8 inch cake would fit nice and snug on the bigger cake. I did cut in half and fill the cakes before fitting them together. Then I frosted in white and decorated on top using a super small round tip for detail, a large round tip for the handle, and a star tip for the pink.

Tuesday, February 19, 2013

Headboard Redo

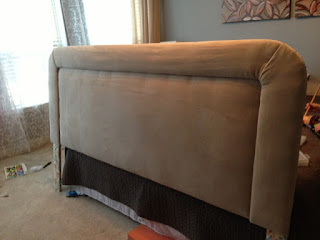
Here is a picture journal of a king sized headboard redo.

Ugly fabric, great shape. We marked the edge of the border with a marker then pulled it off with hammers. Keep the upholstery nails (not staples) that attached the boarder piece, save them for when we reattached the boarder.


The Marker mark is red- we put it there to make sure the staples went past that point.


We laid the upholstery weight fabric backed with batting over the  center, then stapled along the outside edge of the marker guide we drew. then, cut away the extra fabric.


We wrapped extra batting around the boarder because the fabric was gathered and we were too  smart/lazy to remove it... I wish I would have got a picture of how truly hideous the fabric was. we just wrapped it and put a few staples in to keep it in place.


Cuteness.


more cuteness


we stapled the fabric only to the inner curve of the boarder piece so we could wrap the rest of the fabric around to the back side of the headboard. Lift the fabric on the boarder gently and tack the boarder to the main headboard by using the nails we saved from when we removed the boarder.


We didn't have enough fabric for one continual piece around the boarder, so we covered it with three separate piece of fabric. Then we folded the fabric under and overlapped it at the corners. Pulling it tight and stapling it to the back.


Three hours later.


It needed a little something. So we added nailhead trim. Beautiful!